Here’s a step-by-step set of instructions on how to console onto your cisco router or switch from your mac using minicom.
Install minicom via Fink [Fink minicom page]. In the Terminal, type fink install minicom
Purchase the Keyspan PDA adapter. Install the driver and reboot
Configure minicom. Type minicom -s in the Terminal, and select Serial port setup (using the up and down arrows).
mac:~ root# ls /dev/cu*
/dev/cu.serial1 /dev/cu.serial2
Set the serial device to look as follows:
x A – Serial Device : /dev/cu.serial1
x B – Lockfile Location : /opt/local/var
x C – Callin Program :
x D – Callout Program :
x E – Bps/Par/Bits : 9600 8N1
x F – Hardware Flow Control : No
x G – Software Flow Control : No
x
x Change which setting?
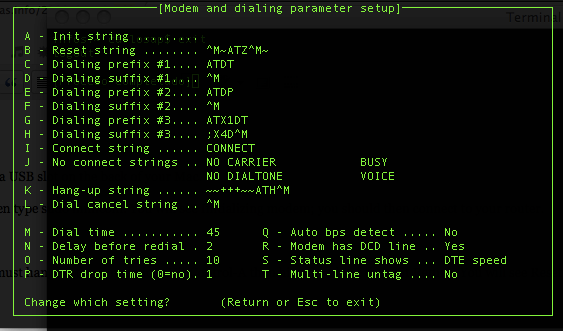
Go under “Modem and Dialing” and remove the “Init String”. Anything in this field will be sent to the device when you connect. The default AT string won’t bother a Cisco device as far as I know, especially if it’s not in enabled or in config mode when you connect, but it’s kinda annoying to have it pop up on connect.
From the main menu use “Save setup to DFL” to create a new config file for minicom.
Verify your «Serial Device» by looking through /dev on your computer for something that looks approximately like above. You might do ls /dev/cu* to find it fast. Don’t choose /dev/cu.modem, and note the «E» settings
USB ADAPTOR
http://sourceforge.net/projects/osx-pl2303/
A -    Serial Device      : /dev/cu.PL2303-0000203A

B - Lockfile Location     : /opt/local/var

C -   Callin Program      :

D -  Callout Program      :

E -    Bps/Par/Bits       : 9600 8N1

F - Hardware Flow Control : No

G - Software Flow Control : No

— this is what Cisco routers require, and note that there’s no flow control of any kind. Save setup as dfl; this is the default config which minicom uses on launch.
Read the rest of the hint for the remainder of the steps.
You will need the following cabling:
patch cable say 7″ long
Cisco rj45 to db9 converter with «Terminal» on oneside 74-0495-01 on the other
db9 female to db9 male null modem cable
Keyspan PDA converter
Connect the cables:
#1 into the console port of the router
#2 goes into #1
#3 goes into #2
#4 goes into #3 and into a USB slot on the back of your Mac.
Shut the router down, then type sudo minicom. You will see Initializing modem; you should then connect to your router.
IMPORTANT:
When you are done you must hang up the connection. Hit Control-A then hit z then hit x then hit Return. You will see Resetting Modem, and then you will exit out of minicom.